I'm so happy that spring has finally arrived. The grass is green, our lilac has a tonne of flower buds on it, and the quince is in full bloom.
So when I was asked to bake some cookies for the 125th anniversary of the boys' school, I decided that some flower cookies were in order.
Making iced sugar cookies is at least a two evening process for me. The first evening I bake the cookies and make the royal icing, and the second evening I do the decorating. Sometimes you need to wait for one layer to dry before you can pipe on the next set of details, so the job can spread out over three or more days. I picked up a great tip from Sugarbelle's website for making the center of the flowers using royal icing and sanding sugar. It saves a day because I can do the flooding and the center detail at the same time.
I started out with two bags of royal icing with flood consistency (like shower gel), and two different kinds of sprinkles.
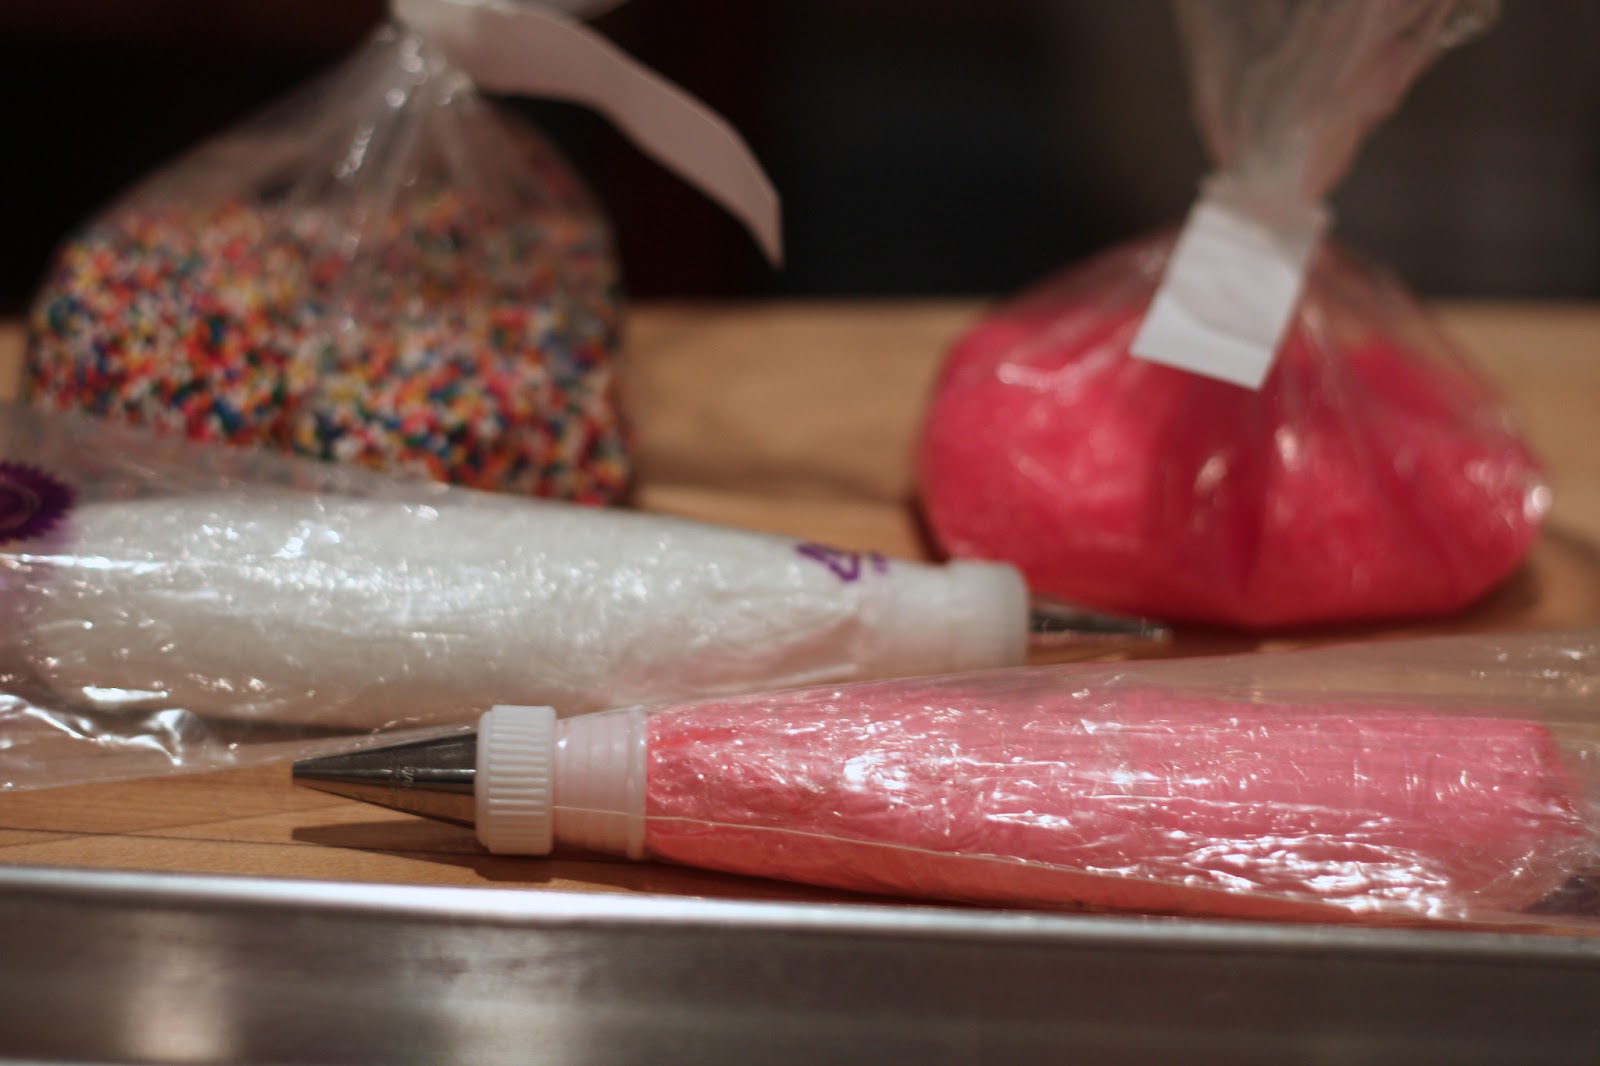
I piped out a tray full of circles onto wax paper taped down onto a large cookie sheet.
Sugarbelle said to let them sit about 10 minutes before sprinkling with the sugar/nonpareils, but I found that they didn't stick very well. Next time I'll pipe out all the circles and then sand them immediately.
The pink sanding sugar covered really well (I piped the pink second so it was wetter) while the nonpareils kind of bounced off the icing and rolled around the tray. They were a failure for cookie use, but are fine for throwing on top of ice cream or cupcakes for the kids.
After waiting a day or two (depending on the humidity) they peel right off the wax paper. If they're sticking, you haven't waited long enough. Once they're fully dry, you can throw them in a container and store them in a cool, dark place forever.
I baked two sizes of flower, and piped the outline in white on both of them. I flooded the small ones with white, and immediately dropped the pre-made center into the wet icing.
Alan came down just as I was finishing and said "I like your nipple cookies". Nice.
I hadn't seen it. And I didn't stick around the baking table at the 125 Celebration to see if the pre-teen boys snickered over them like my full-grown husband did.
Saturday, 11 May 2013
Wednesday, 8 May 2013
The shoe storage solution
With four people in the house using the front door and main hallway every day, there tends to be an accumulation of shoes. A lot of shoes.
Although I built a low shelf in the bottom of the closet to provide additional storage space, it wasn't quite enough to deal with the running shoes, cleats, boots, etc that are used on a regular basis around here. So in an attempt to keep things corralled, I built in some shoe storage last weekend.
I started with 1' x 10" boards, which is what I used for the two shelves that were already in the closet. I cut them to size and built a simple box.
The width of the openings in the box is 10". I determined how wide I should build it based on a pair of Alan's shoes sitting side-by-side. Sandals can be stacked so that multiple pairs fit inside each cubby.
I nailed in all the shelves, and then filled, sanded, primed and painted it before installing it in the closet. That way there were no touch-ups needed on the walls. A little caulking around the seams, and we had ourselves some much-needed storage.
Although I built a low shelf in the bottom of the closet to provide additional storage space, it wasn't quite enough to deal with the running shoes, cleats, boots, etc that are used on a regular basis around here. So in an attempt to keep things corralled, I built in some shoe storage last weekend.
I started with 1' x 10" boards, which is what I used for the two shelves that were already in the closet. I cut them to size and built a simple box.
The width of the openings in the box is 10". I determined how wide I should build it based on a pair of Alan's shoes sitting side-by-side. Sandals can be stacked so that multiple pairs fit inside each cubby.
I nailed in all the shelves, and then filled, sanded, primed and painted it before installing it in the closet. That way there were no touch-ups needed on the walls. A little caulking around the seams, and we had ourselves some much-needed storage.
Monday, 6 May 2013
Spring cleanup
We took advantage of the warm weather this weekend and did some tidying up in the back dump yard.
It didn't always look this bad. When we started reno'ing last year we weren't sure if we would replace our appliances. Since we were doing the entire basement, main floor, and half of the second floor, and we don't have a garage, the appliances ended up under tarps on our back patio. And there they sat since last July. At some point recently the tarps blew off.
We tried to locate a charity that could use them. While the dryer was really old, we bought the washer and stove when we moved into the house in 2000 and they were both still in great condition. Unfortunately, not many charities are interested in appliances, and Habitat for Humanity has a bunch of hoops you have to jump through before they'll agree to accept them.
For most of the winter we didn't really even notice that they were there as it was dark by the time we got home in the evening. And then they just became part of the landscape. It's been such a miserable spring that we haven't been out in the yard. But with the fantastic weather this weekend, I realized how badly I wanted those things gone.
Thankfully, there are lots of guys listed on Craigslist who will come and haul away your old appliances for free. We called one and he'll be here on Tuesday to take it away. I'll be happy to be able to set up our table and chairs on the patio. Hopefully it won't be for long though - we plan to build a raised deck outside of the sliding doors and a large patio beyond it.
We have an unusually long yard for the middle of the city. It's 20'x210', so it feels a little like a bowling alley. I think that dividing it up into smaller, defined areas will help break up the long, alley-like feel. The plan is to build a raised deck area where we can put the BBQ and some comfortable seating (I'd like one of those L-shaped sectionals) right outside the door, and then steps down to a large patio at ground level where we can put the table and chairs. Whatever we do, it's going to be a big improvement over what we have currently!
It didn't always look this bad. When we started reno'ing last year we weren't sure if we would replace our appliances. Since we were doing the entire basement, main floor, and half of the second floor, and we don't have a garage, the appliances ended up under tarps on our back patio. And there they sat since last July. At some point recently the tarps blew off.
We tried to locate a charity that could use them. While the dryer was really old, we bought the washer and stove when we moved into the house in 2000 and they were both still in great condition. Unfortunately, not many charities are interested in appliances, and Habitat for Humanity has a bunch of hoops you have to jump through before they'll agree to accept them.
For most of the winter we didn't really even notice that they were there as it was dark by the time we got home in the evening. And then they just became part of the landscape. It's been such a miserable spring that we haven't been out in the yard. But with the fantastic weather this weekend, I realized how badly I wanted those things gone.
Thankfully, there are lots of guys listed on Craigslist who will come and haul away your old appliances for free. We called one and he'll be here on Tuesday to take it away. I'll be happy to be able to set up our table and chairs on the patio. Hopefully it won't be for long though - we plan to build a raised deck outside of the sliding doors and a large patio beyond it.
We have an unusually long yard for the middle of the city. It's 20'x210', so it feels a little like a bowling alley. I think that dividing it up into smaller, defined areas will help break up the long, alley-like feel. The plan is to build a raised deck area where we can put the BBQ and some comfortable seating (I'd like one of those L-shaped sectionals) right outside the door, and then steps down to a large patio at ground level where we can put the table and chairs. Whatever we do, it's going to be a big improvement over what we have currently!
Friday, 3 May 2013
Mr. Fox and the Search for the Missing Dress
Lest you all think that I ended up with all the talent in the family, I'm presenting my teenage niece's latest project.
I love it!
But you know, it just adds one more thing to my list 'o stuff that I want to learn how to do!
Mr. Fox and the Search for the Missing Dress
I love it!
But you know, it just adds one more thing to my list 'o stuff that I want to learn how to do!
Thursday, 2 May 2013
Bench, deconstructed
Now that our new kitchen table is sitting in a corner of the the dining room, begging to be put to use, I'm itching to get the bench for it finished.
So yesterday after work I tackled stripping all of the old upholstery from it using three handy little tools. I know that there are special upholstery tools for removing staples and nails, but pliers and a flat screwdriver did the job just fine.
I thought I would whiz through it and be done in about 45 minutes, but it took hours. I removed at least 3 billion staples, nails, and upholstery tacks.
Lucky for me, the guts of the seat are in good shape, so I don't have to do a lot of restoration beyond refinishing the wooden arms and legs.
When I was removing the upholstery on the seat it went smoothly until I hit the front. For some reason, the previous upholsterer had stapled the fabric down, and then glued the wooden trim piece right over the top of it. It was really nerve wracking to take a screwdriver and pry off the front piece of trim so that I could get the fabric off. Thankfully it came off in one piece.
This weekend I hope to get the wood stripped and stained in the same walnut colour that I used on the kitchen table. And if I can find some fabric I like, I might even get the upholstering done.
I may sneak down to Queen West on my lunch today to look for fabric. It's sunny and warm - just perfect for a midday stroll.
So yesterday after work I tackled stripping all of the old upholstery from it using three handy little tools. I know that there are special upholstery tools for removing staples and nails, but pliers and a flat screwdriver did the job just fine.
I thought I would whiz through it and be done in about 45 minutes, but it took hours. I removed at least 3 billion staples, nails, and upholstery tacks.
Lucky for me, the guts of the seat are in good shape, so I don't have to do a lot of restoration beyond refinishing the wooden arms and legs.
I discovered that the beautiful 80's fabric was covering up some even uglier 40's (?) fabric. Alan came down partway through the deconstruction and was worried that the lovely green and gold pattern was the fabric that I was recovering with. Seriously? I should have just let him believe it to see what he would say.
This weekend I hope to get the wood stripped and stained in the same walnut colour that I used on the kitchen table. And if I can find some fabric I like, I might even get the upholstering done.
I may sneak down to Queen West on my lunch today to look for fabric. It's sunny and warm - just perfect for a midday stroll.
Saturday, 27 April 2013
Champion #2!
It's a red letter year for hockey in our household.
Cal's team won the Parkdale Flames house league age division and Matthew's team won the city-wide Select championship tournament this week.
Matthew is thrilled. And Alan is absolutely over the moon. Matthew's team is moving up to Single A level next year, so they're leaving the Parkdale arena (for some reason beyond my comprehension, they can't have a single A team at Parkdale). Last night there was a party at the rink to celebrate the championship and the end of playing for the Flames.
And Matthew, of course, volunteered me to make a cake for the celebration. He was so excited to take a fancy cake that I didn't have the heart to say no. So I stayed up baking until after midnight on Thursday night, and then rushed home yesterday to decorate the cake.
I used the Campfire Cake recipe that I baked for Alan's birthday, but only made the malted chocolate buttercream to fill it. The toasted marshmallow filling is my favourite, but since I was baking the cake in a 9x13 pan, would only have one layer of filling, and was finishing with marshmallow fondant, I decided to go with the chocolate buttercream.
I used their home team jersey as a template (so they wouldn't be eating a tonne of black fondant) and manufactured a cake version of it.
Matthew was as proud as a peacock taking the cake into the party, so it was well worth all the trouble!
Cal's team won the Parkdale Flames house league age division and Matthew's team won the city-wide Select championship tournament this week.
Matthew is thrilled. And Alan is absolutely over the moon. Matthew's team is moving up to Single A level next year, so they're leaving the Parkdale arena (for some reason beyond my comprehension, they can't have a single A team at Parkdale). Last night there was a party at the rink to celebrate the championship and the end of playing for the Flames.
I used the Campfire Cake recipe that I baked for Alan's birthday, but only made the malted chocolate buttercream to fill it. The toasted marshmallow filling is my favourite, but since I was baking the cake in a 9x13 pan, would only have one layer of filling, and was finishing with marshmallow fondant, I decided to go with the chocolate buttercream.
I used their home team jersey as a template (so they wouldn't be eating a tonne of black fondant) and manufactured a cake version of it.
Matthew was as proud as a peacock taking the cake into the party, so it was well worth all the trouble!
Tuesday, 23 April 2013
The kitchen table
The kitchen table is all finished, and I'm thrilled with how it looks.
When you compare these pictures with the before pictures, it's hard to believe that it's the same table.
It's sitting in the bay window in the dining room right now, waiting for the varathane to cure. I figure I'll give it at least a week, because it's sure to get a lot of abuse from two small boys in the coming years.
Next up is the seat that I plan to use as a banquette with this table. Goodbye granny fabric!
When you compare these pictures with the before pictures, it's hard to believe that it's the same table.
It's sitting in the bay window in the dining room right now, waiting for the varathane to cure. I figure I'll give it at least a week, because it's sure to get a lot of abuse from two small boys in the coming years.
Next up is the seat that I plan to use as a banquette with this table. Goodbye granny fabric!
Subscribe to:
Posts (Atom)