Friday 31 May 2013

New chair for Cal

Cal spends a lot of time in his bedroom drawing, playing his keyboard, and just hanging out. He had one of our old kitchen chairs to use for his desk and keyboard, but it was kind of heavy and didn't fit into the leg hole space in his desk well. He was in the market for a new chair.


I found a chair down on Queen West for $6, and loved the shape and detail of the back of it. It wasn't very attractive when I brought it home - I think that Alan thought that I'd lost my mind. Or perhaps he's just tired of me dragging home random chairs. 

Anyway, I had this really ugly chair hanging around on my front porch for months before I got around to refinishing it. It was painted a flat mauve, with chips showing the puce green it was painted previously. And the seat had all kinds of paint splotches on it.


I'm not sure if they were done on purpose, or if the person who painted it was just too lazy to take the seat off. Which is saying a lot in the laziness department because the seat wasn't even screwed on, it was held on with little hooks that you just pulled free from the chair frame. No screwdriver required.

It took me forever to strip the stupid thing back to bare wood. While the trellis pattern back looks nice, it has a million small crevices to scrape the paint out of. My initial plans were to stain the wood the same dark walnut finish of Cal's bed. I almost threw in the towel several times in favour of spraying it black as it would have been so much easier.

I stuck it out, though, and after a lot of stripping and sanded I ended up here.


Two coats of walnut stain and satin varathane, and I was very happy that I hadn't given up and resorted to paint.


I picked up some bright microfiber to cover the seat as it's nice and easy to clean. Our old living room furniture was covered in microfiber and it's amazing the stuff that wiped off, including food, marker, ink and assorted bodily fluids from babies and small children. It also repelled dog hair.


I bought enough fabric to make a coordinating cover for Tessa's bed. She sleeps in Cal's room at night, and the poor thing has the ugliest brown cover on her bed. Plus it's kind of an awkward size and takes up too much space in the room. We have a smaller rectangular one downstairs that she sleeps on, so I'll make her one the same size for up here. The cover of this one unzips, so I can just use the inside of this bed in the new cover.


I'm also in the process of changing Cal's curtains into a roman shade so that his room is very dark. Now that the sun is up so early, Tessa is also up tap dancing along the hardwood floors. The early morning wake-ups are killing us!

Wednesday 29 May 2013

Backyard clean-up

Oh the excitement! Today the boys and I arrived home after work to see this at our curb.


Our wonderful contractor had come by this afternoon (unbeknownst to me) with some of his guys to help us out with our little problem. The one that looked like this.


When we started the reno I wasn't convinced that I wanted to replace all of our appliances. I thought that we should see how much the reno was going to cost (since I was sure that we would uncover lots of unseen problems behind the 100+ year old walls) and then make the decision. Along the way we decided that we should just get it all over with at once, and I haven't regretted that decision in the least.

Except for the fact that we've been staring at the pile of crap in the yard. We tried to donate the appliances to Habitat for Humanity but they wanted pictures and purchase dates and manuals, so it was too big of a pain. Then we tried to find a charity that could use them, but that fell flat too. And before we knew it, winter was finally over, the appliances remained, and I was dying to use our patio.

Now I finally can. It took a lot of sweeping (and several blisters) to get the detritus all cleaned up. We didn't weed or sweep the patio at all last summer or fall, so it was in really rough shape. It's all set to go for outdoor dining now, though. Just in time for the hot weather we're expecting over the next couple of days.


We got the BBQs set up right next to the house, where perhaps we'll be more likely to fire one of them up on weeknights. 


The patio really needs to be redone. We laid reclaimed bricks from the foundation of the original back stairs (a tiny uninsulated entry to the basement from the back of the house) when we did the extension about 10 years ago. There appears to be two different kinds of brick - some are very resistant to the freeze-thaw of winter, and some of them crack to pieces. Every spring we have to replace a few. And the weeds that grow up between the bricks drive me batty.

We were planning to replace the patio and build a raised deck at the level of the door this summer, but now we're thinking of waiting until fall or next spring. It will allow us to get use of the backyard this year, without the mess of all that construction. And that sounds pretty appealing to me.

Monday 27 May 2013

Cookies & Cream Cupcakes

This weekend, like most, was a busy one in our house. We were invited to a BBQ with friends from work on Saturday afternoon, and with Matthew's hockey team on Sunday. I decided to bake cupcakes for both of the parties. Five dozen in all.

Since these parties involved many small boys, and all small boys love Oreos and chocolate (Cal excepted), I decided that some Cookies & Cream cupcakes were in order.

Yes, that is an Oreo cookie baked inside the cupcake. Decadent

I used my go-to chocolate cake recipe and popped an Oreo into the bottom of each cupcake liner before filling each cup 2/3 full with batter. 


The Oreo stayed at the bottom of the cupcake, but I think that it might be better to have it in the middle. Next time I'll try filling the cups 1/3 of the way, drop in the Oreo, add more batter to the top, and hope that the cookies stay put while they're baking.

While the cupcakes themselves were delicious, the pièce de résistance was the Cookies & Cream buttercream icing. It was light and fluffy and delectable. Seriously, how can you make buttercream better? All you need to do is add Oreos.

Cookies & Cream Buttercream
1 pound of butter, softened
3 1/2  cups icing sugar
2-3 tablespoons whipping cream
2 teaspoons vanilla extract
12 Oreos, chopped

     1. Whip butter in an electric mixer fitted with the paddle attachment until pale and creamy. This takes about 5 minutes on medium speed in my KitchenAid.
     2. Add the icing sugar, cream and vanilla. Mix on low speed for a minute until icing sugar is incorporated, and then on medium speed for 5 minutes until light and fluffy. Add in chopped Oreos and mix for about 1 more minute.


Then all that's left to do is ice the cupcakes and top with a mini Oreo.


 Oh, and fight off the hungry beasts children until the five dozen cupcakes are packaged up and hidden away.


Well, since the evidence is smeared on Cal's face I might as well admit that we might have made that five dozen less two.

Wednesday 22 May 2013

New dining table

I've been (not so) patiently stalking Kijiji, Craigslist, and the neighbourhood antique stores in hopes of finding a new dining table. While our old Duncan Phyfe table fit well into our previous tiny dining area, it looked really small and insignificant in the new open space.


And at only 36" across, it didn't actually provide enough space for comfortable dining for greater than four people. And even with only four of us, we didn't have room on the table for serving dishes.

Since we eat dinner as a family in the dining room every day and we like to entertain, a new table was high on my list of priorities.

The shape of the dining room with the bay window in it was just begging for an oval table. It turns out they're not so easy to find. Finally, a couple of weeks ago I found one on kijiji for sale just around the corner from us. 


The new table is 52" across and has four 11" leaves. It opens up to 96" and can comfortably seat 10 people. Much better than our old table, which could just barely fit place settings for six. Two of the four leaves have the apron on them, so the table can be opened to 74" without using a tablecloth. For everyday use we just leave one in it.

I love the detail of the three legs on each end, and the wide apron gives it much-needed weight in the big open room. 


I was lucky and our old dining chairs match the colour of the table quite well. I'm still stalking antique stores and Craigslist though, because I have a bit of an obsession with balloon back chairs right now. I'd love to find a set to go along with our new table. 


Boy, I need to get to work and make some shades for those long, empty windows.

Monday 20 May 2013

Spring gardening

With the beautiful weather this long weekend, I finally had a chance to attack the yard with my little helper.


I didn't bother doing anything with our vegetable garden last year since we were away for the whole summer. And our front yard was torn up and then was basically a dumping ground over the course of the renovation so everything was in really rough shape.

I started out in the back. I should have started a few weeks ago, before the weeds grew as tall as Cal.


When we had the basement excavated last spring, they used the front garden to store the sand that they dug out before loading it into dumpsters to drag it away. While they were here digging, I arrived home one day to discover that my bridal spirea had been yanked from the ground by the bobcat. I was staring dejectedly at it lying all shriveled on the lawn with its bare roots exposed and woman walking her dog stopped to tell me that if I put it back in earth and gave it a really good soaking, that I could probably save it.

I was hoping to put it back in the front garden when they were finished digging in the basement, so I stuck it in some dirt in a recycle bin and left it in the backyard. And there it sat for the next year.


Today I finally got around to putting it in the ground. It's not where it'll be for good, as we need to redo the patio this year, and will change around the garden beds near the house, but at least it's out of the blue box and in the ground. 

 While I was pulling out the weeds I realized what bad shape the raised beds were in. I built the four beds out of cedar while I was off on maternity leave with Matthew. I didn't use pressure treated wood because I planned to use them for my vegetable garden.  I lined the boxes with heavy plastic, but it didn't seem to protect the wood from moisture and they were all rotting and falling to pieces.


I pulled apart the raised beds on the left side of the yard and spread the earth out across the path that was between them. Then I planted the spirea and moved a red current bush from one of the gardens next to the patio.


I still need to remove the raised beds on the other side, but the rear bed is overflowing with raspberry bushes. It was too warm to wear long sleeves and pants today, and I wasn't in the mood to be scratched to bits. That job will have to wait for another day.

After I finished with the vegetable beds I moved out to the front yard.


Almost all of the plants that we had out front were killed over the course of last summer so it was looking really bare. And kind of weedy.

I started out by laying a path using stones from the backyard. Matthew likes to shortcut through the garden to the front door after he walks Tessa in the morning (and drops off the doggy bag in the garbage out back). Boy, were those stones heavy to drag around - I'm going to be sore tomorrow!


I didn't buy any new plants this year since we still have plans to redo the front porch, and are definitely tackling the back patio this summer. I have a lot of perennials out back, so I figure that I'll move them out to the front garden this year, and then can move some of them back after we finish the patio. We can do a complete overhaul of the front next year.

I dragged around a bunch of hostas, a sedum, some irises, and a bleeding heart. I hope that the bleeding heart makes it - it was incredibly wilty after I moved it. Thankfully it's going to rain for the next few days, so the garden will get a good soaking.


I'm still not completely finished, but after spending seven hours at work, I decided it was time to call it quits and pay some attention to something that really matters.


Friday 17 May 2013

The jumping beans

Yesterday the boys competed in the TDSB south region track and field meet at Varsity Stadium. Matthew in the triple jump, and Cal in the standing long jump. Who knew that our kids were champion jumpers?

Well, maybe not champions, but at least good enough to represent their school for their respective grades.

It was a beautiful warm, sunny day -  just perfect for an outdoor meet. Alan and I took the morning off work and walked up to the stadium, which is conveniently located on campus just a couple of blocks from our buildings. It was a pretty exciting event - there were several hundred people there, with jumping events going on in the center field concurrently with the running events on the track.


It was fun to watch the boys compete. They were both very serious about it. In an unusual display of restraint Cal sat quietly awaiting his turn. Perhaps nerves played a role?


And his jumping style left me in stitches. He looked so frog-like.


But style aside, he can jump 1.51 meters (almost 5 feet). Not bad for someone who just turned 7 and isn't anywhere near 5 feet tall yet! 

While Cal had been practicing at school and home, Matthew hadn't really been working on his jump. But the goofy look of intense concentration on his face while he was competing shows how very serious he was at the event.


They didn't appear to give out ribbons after Cal's event and we haven't heard anything, so we assume he isn't moving on to the city finals. Matthew placed 4th in his event, so he's moving on.


It's kind of funny that Matthew's moving on to the next round because he wanted to skip school the day they were doing the track meet because, as he put it, "I hate track and field".  He doesn't seem to hate it quite as much now - perhaps we'll make a track star of him yet!

Tuesday 14 May 2013

The Hockey Trifecta

It's been a banner hockey year in our household. Cal's team won their house league championship game, Matthew's select team won the city championship, and now the infamous Flying Puckheads have won their Hockey Association of the Arts division championship.

And I've got the 400 pound, butt-ugly trophy on my mantle to prove it. Even though it looks like a child made it out of cardboard, that sucker is welded from some seriously heavy metal.


Thankfully there's only one trophy, so it needs to make the rounds of all the players on the team. Hopefully the circulation starts sometime this week. 

Not bad for a team of mainly middle age badass science profs!


Monday 13 May 2013

Living room drapes

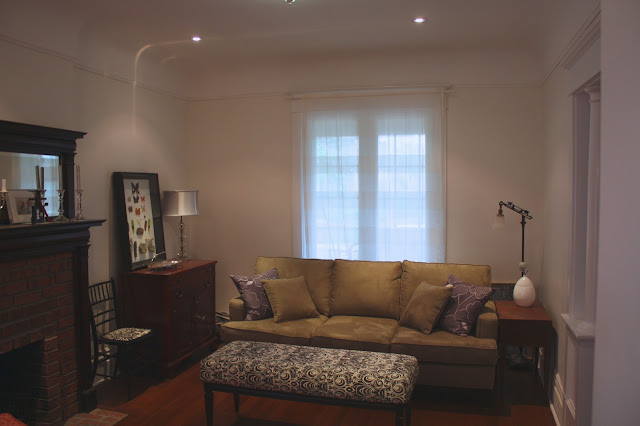
Finally! Drapes in my living room!

I've been living with too-small sheers in the living room window since we moved back into the house. And for the past several weeks they've been worse than usual as I've only had one of them hanging.


Back in January I bought the material for drapes. The fabric is a pale silvery grey, with embroidered flowers in charcoal and taupe.


I procrastinated about making them for months. I was feeling kind of intimidated about sewing them, and was especially dreading putting in the grommets to hang them. So I waited for my talented sister to get home from her winter travels so I could rope her into helping me. Wonderful sister that she is, she actually took the material away and made them for me for my birthday!

This morning my sister in law, niece and I ran in the Sporting Life 10K race and the rest of the family came into the city for brunch after to celebrate Mother's Day. My sister came bearing delicious muffins and my new drapes. Did I mention how wonderful she is?

After everyone left I  really wanted to take a nap 'cause I'd been up since 6 am, but I wanted to get the drapes hung even more. And seeing how it was Mother's Day, my wish was Alan's command.

Well, not really, but he did help me out without complaining or getting grouchy when we ran into a problem.

We pulled down the old curtain rod. You can appreciate how off center the window in the living room is, and why I decided to go wall to wall with the new drapes.


We got the outer brackets hung, and then realized that we had a big problem since the rod has to sit across the trim at the top of the window. The three brackets that were included with the rod were all the same size, of course, but the window trim is a few centimeters thick. We couldn't attach the central support for the rod, and even if we could figure out an alternative support for the center, there isn't enough space between the rod and the trim for the curtains to slide.

There are two possible solutions for this problem (1) build out the brackets that attach to the wall at either end, or (2) find longer brackets for the two ends. Solution 2 seems easier than trying to figure out some way to shim out the brackets from the wall, so a trip down to Designer Fabrics is in my near future.

Since we had the rod ready to go and I was dying to see how the drapes looked, we hung them up. I just stuck a long screw in the center for the rod to rest on. While there's no space for them to slide closed in front of the window, they need to be bundled at the side for a few days anyway to make sure that the pleats are all regular and lined up. 


They look gorgeous. They add some much needed depth to the room, and it's amazing how much cozier they make the living room feel.

Next up - figuring out how to reface the ugly 70's brick on the fireplace and a new area rug.
Related Posts Plugin for WordPress, Blogger...