Showing posts with label pinterest projects. Show all posts

Monday, 18 November 2013

Custom canvas "art"


This weekend I finished up painting the stairway and second floor hallway. Well, I finished the ceiling and walls in the hallway - I still have the 4000 pickets to prime and paint on the second and third floors before I can call it a day.

After I put away the roller and paint, I decided to tackle this little problem area at the bottom of the stairway.


The other side of this wall is the coat closet in the front hallway. The high ceilings on the main floor meant that there was a lot of dead space in the top of the hall closet. Our wonderful contractors came up with a plan that allowed us to use this space from the back side of the closet. I love this space - we store all of our out-of-season coats/boots/hats here.

It's amazing storage, but unfortunately it left us with a couple of ugly doors high up on the wall. I had them use concealed push latches so that there are no handles on the wall, but I was unhappy with the obvious lines. I considered some kind of paneling/decorative trim, to disguise them, but them decided that hiding them with artwork would be easier.

And so the hunt began. I've been keeping my eyes open for ages. I wanted something that would be easy to take up and down, as while we don't access this cupboard weekly, I find myself in and out of it a lot more frequently than one would predict.

I was browsing at Designer Fabrics down on Queen St., and came across fabric that looked a lot like a watercolour painting. It seemed like it could provide the perfect solution to the problem. Wrapping it around a light frame would allow me easy access to the cupboard, and since I would build the frame myself, I could design it any size I wanted.

So on Saturday I trotted off to Home Hardware and picked up a couple of lengths of 1x2 pine. I measured the doors and the landing and decided on the size of the canvases. I debated one versus two; although one would have been easier, I thought a matched set would be more interesting.

I used the chop saw to cut the pine to length, nailed the pieces together into rectangles, cut the fabric to size, and used the staple gun to attach it to the frames.


I then attached wire to the back and hung the canvases on the wall. The fiddling to get the nails in the right spot and the wires the correct length seemed to take me almost as long as the rest of the project did!


I'm really happy with how it turned out. And if I get tired of this fabric, it's easy to swap it out. Who knows, maybe I'll make a couple more frames so that I can change them with the season - put up some Santas or Easter bunnies.

The paint and the frames make a big difference in the dining room. This wall is right next to the table, so we're staring at it every evening.


The frames are hung a little closer to the ceiling that I might have liked, but if I hang them any lower the upper edge of the doors is exposed when you're walking down the stairs.

I'm toying with the idea of a third canvas. I have just enough fabric left to make one. What do you think?

Wednesday, 30 October 2013

Hallowe'en wreath

I've become a wreath person. I'm not sure how it happened - maybe it's because I've hit middle age. Or maybe I just came to realize that it makes your house look a little nicer to have some sort of decoration up outside.

Oh, and I love the reactions that I get from the boys. Matthew's is usually something along the lines of "now that's a little unnecessary". Cal's is always complimentary, but he's much more sensitive than Matthew and might not want to hurt my feelings.

This wreath, though, they both love. It's so spooky and Hallowe'en-y.


I started off with three black boas (thank goodness for Dollarama - I can always count on them for the boas), a bag of ping-pong eyeballs, a bag of eyeball ring-pops and some silvery spider ribbon.


I just wrapped the boas around and around the wreath form, and then hot glued the eyeballs on. I considered adding in a sparkly black and silver spider,


but decided it was too much on the wreath.

Cal is soooo excited about Hallowe'en this year. And being the rotten disorganized parents we are, we haven't got a pumpkin yet. Alan went out after hockey on Monday night to find one, but the stores that were open were sold out. I guess we'll try tomorrow morning and hope for the best.

Sunday, 24 February 2013

Terrariums

I have a bit of an obsession with terrariums. There are so many styles, ranging from huge enclosed complex ecosystems that never need to be watered to small and whimsical in glass jars.


I'm really drawn to the small and whimsical made with succulents. The fact that I appear to be genetically defective in the gene that allows you to keep houseplants alive may or may not have something to do with this. Succulents seem to be almost indestructible, and very forgiving of neglect in the watering department.

Since I love them so much, I naturally assumed that the female members of my family would too and made some as Christmas presents this year. I also made one for myself to put on the window ledge behind my kitchen sink. They're really simple to put together.

I picked up some apothecary jars from HomeSense and some succulents from a local shop. They didn't have a very big selection, but they had a few different types to add some interest.


I also bought some rocks of different sizes. The larger ones I got at the dollar store, and the small black pebbles came from an aquarium supply store. I layered them in the jar, starting with the largest on the bottom and worked my way up through the progressively smaller stones.


I picked up some Hermit Crab Sand for a very fine layer just below the soil, and I also mixed it in with the soil to make it a little lighter for the succulents. Alternately, you can buy soil made for succulents and cacti.


It's been a couple of months since I put my terrarium together, and the plants are still alive! It was a fun and easy project, and a great way to spend a cold winter afternoon with my boy.


Sunday, 27 January 2013

Pinterest challenge - Matchbox car art


When I was cleaning out the basement in preparation for the reno, I came across a bag of old matchbox cars.


I think most of them were passed along from my eldest nephew (he's 22 now), who was obsessed with them when he was young. He would spend hours lining them up in neat little rows. And his devilish little brother took great joy in waiting until he had them all perfectly arranged, only to swoop in and smash them across the room.


While my kids never really played with them, remembering how much Ryan loved them I didn't have the heart to just get rid of them. But I also didn't want them kicking around in my house in a little cloth bag forever. At some point in the past I had seen a picture of a shadow box filled with cars, so I was happy when I came across the perfect frame to use.


I enlisted Matthew's help in pulling the frame apart, and he was more than happy to comply.


He pulled the back off, opened the frame up, and did some test-fitting to make sure that the frame was deep enough for the cars to fit.


The depth of the box was perfect, so I taped up the glass on the front and sprayed the frame with a few coats of black paint. That was a little tricky since it was so cold outside last weekend and I was worried that the paint would never dry. I ended up putting the frame on an old tile that we had hanging around, taking it out on the porch to spray, and bringing it right back inside between coats.


We waited a couple of days to give the paint some time to cure and then arranged the cars inside. I used a piece of white card stock on top of the ugly bathroom print so that it wouldn't show through between the cars. Arranging the cars took some time - fitting them in the frame without leaving gaping spaces was like piecing together a puzzle.


In the end we were only able to fit about 3/4 of the cars into the frame, so it wasn't a total success in ridding my basement of the clutter, but is Matthew ever proud of how it looks. When we were making it we planned to give it to Ryan, but now I'm not sure if Matthew will be willing to give it up easily!


Saturday, 12 January 2013

Pinterest challenge - Pincone firestarters


I love Pinterest. The only problem with it is that I currently have about a million projects pinned. Oh, and I'm constantly pinning new ones. In an effort to make some progress on the backlog, one of my New Year's resolutions is to complete at least two pinned projects each month. Not that 24 projects will really make a dent in the number I have pinned, but it'll make me feel less guilty about pinning more!

A project I found on the internet long before Pinterest is firestarters. I really wanted to make some for the cottage during the colder months; before we close up after a weekend up there we always clear the ashes out of the wood stove and lay a new fire, all ready to be lit as soon as we arrive the next time. But most of the directions I found for firestarters included dryer lint, egg cartons, and great vats of scalding hot parrafin wax. Very scary sounding, and not so attractive a product, to boot.


Then last fall I discovered a tutorial for making firestarters from pinecones and tealights at Kate's Creative Space and pinned it. This afternoon Cal and I tackled it.

Back in December, before it snowed, we spent an afternoon walking Tessa and gathering pinecones from around the neighbourhood. Luckily, several nearby schoolyards and parks provided us with a source of free cones. We had to do a fair amount of hunting to find pretty ones, as many of them had been stomped on by hordes of small children and had a lot of broken scales.


Instead of messing about with melting vats of wax, this project uses tealights. Because the wax needs to encase the bottom of the pinecone we first removed the tealights from their metal casings. It was pretty easy to peel away the metal shell. Even Cal could do it, although I held my breath the whole time, convinced that I was setting myself up for a trip to emerg to stitch up a little finger. He surprised me, though, and made it through unscathed.


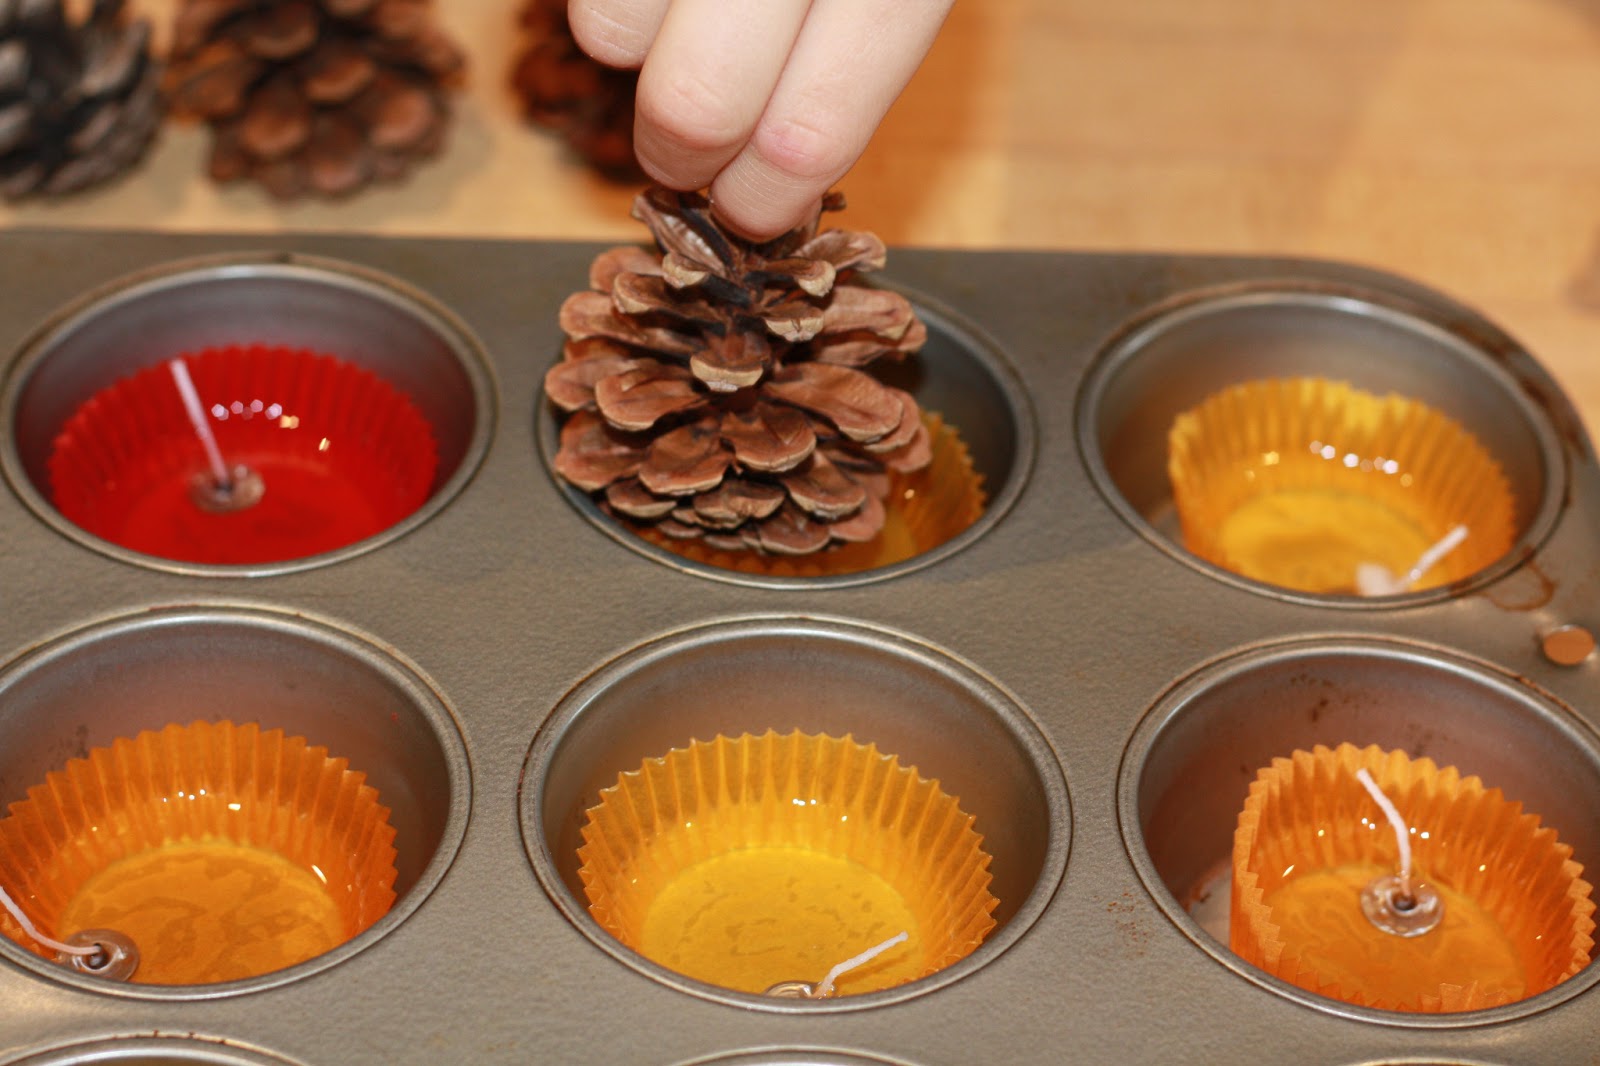
The next step was to pop the tealights into lined muffin tins. Because I wanted the wax to cover as far up the pinecone as possible, we used small paper cupcake liners. Cal carefully pulled the wicks up to stand tall from the candles so that they would be easy to move to one side after the wax melted.


Then we popped the tealights into a 250° oven until they were completely melted. In the meantime, Cal picked out a dozen of the best looking pinecones we had and lined them up in preparation for the next step.


Using tweezers, I pulled the wick to one side of the cupcake paper and Cal dropped a cone into the wax. 


We waited until the wax cooled, peeled away the paper, and had a dozen really pretty firestarters.


Much more attractive than the egg carton/lint variety, n'est pas? I can hardly wait to try them out; it makes me really wish that we had a functioning fireplace here at home!


Related Posts Plugin for WordPress, Blogger...